
Configure Edge Chromium for a seamless end-user migration from Google Chrome with MEM
As you know by now, Edge Chromium is Microsoft’s newest browser which integrates Edge and Internet Explorer into the one browser to rule them all. There are a lot of valid reasons to migrate to it, but the most difficult part with is getting your users to adopt the new browser. In this blog post, I will show how configure the browser so that the migration is as seamless as possible.
Why Edge Chromium?
Let’s get this out of the way first: why would you even care about Edge Chromium?
- It’s based on the Chromium-engine, which makes it powerful and fast
- It has all the features from Google Chrome (extensions, favorites…)
- With Internet Explorer mode, your legacy websites can be opened within Edge. Makes enables you to only have one browser on a computer
- All user data (passwords, extension, favorites…) is sync’ed to the AAD account of a user.
- It has a mobile app which supports App Protection Policies for secure mobile access.
- Updates can be managed with MEMCM.
Migration
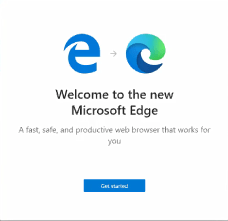
When you push Edge to a end-user for the first time, this is what the initial logon process looks like.
If an end-user has to sit through that, they will likely switch to Chrome again. Not all the data from Chrome has been migrated and the user will not be inclined to migrate. Luckily, Edge Chromium has a plethora of policies available which can make it real smooth.
ADMX Policies
For a smooth transition, I recommend the following Intune policies:
- Automatically import another browser’s data and settings at first run
- Configure the Microsoft Edge new tab page experience
- Hide the First-run experience and splash screen
- Default search provider name
- Enable the default search provider
- Default search provider search URL
- Browser sign-in settings
- Force synchronization of browser data and do not show the sync consent prompt
Intune Configuration
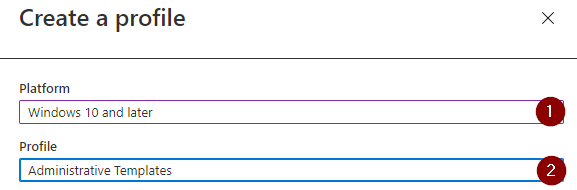
To configure this policy, navigate to https://endpoint.microsoft.com > Devices > Windows > Configuration Profiles and click ‘Create profile’.
For your platform select ‘Windows 10 or later’ and as Profile pick ‘Administrative Templates’
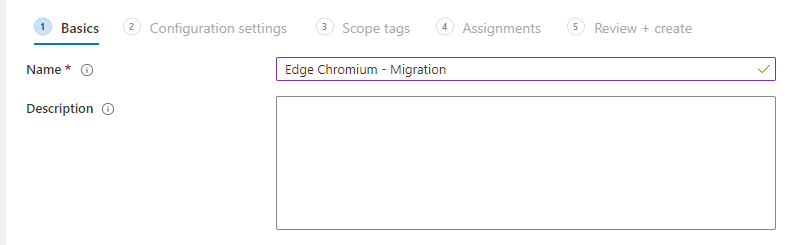
Give your policy an appropriate name and select ‘Next’.
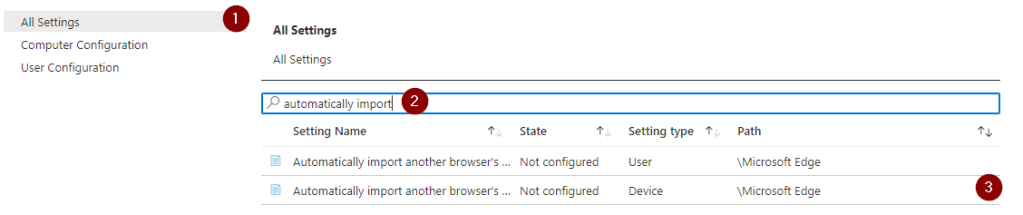
Within the ‘Configuration settings’ part of the policy, we will configure the necessary settings. Select ‘All settings’ (1) to see both Computer and user Settings. You can easily search for the correct settings through the search bar (2). Whether you choose computer or user settings depends on your use case. I mostly choose computer settings, as I want all users on the same device to have the same user experience.
Import data
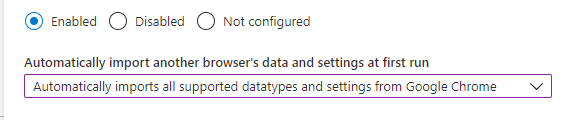
The first setting we are going to configure is the ‘Automatically import another browser’s data and settings at first run’.
Enable the setting and choose to import data from Google Chrome. This will import the following information:
- Favorites
- Saved passwords
- Addresses and more
- Payment info
- Browsing history
- Settings
- Pinned
- Extensions
- Cookies
If you want, you can have Edge import the default browser of the user. That way, if a user uses Firefox, all their data will still be there.
Tab Experience
Enable the setting ‘Configure the Microsoft Edge new tab page experience’ and select ‘Office 365 feed experience’.
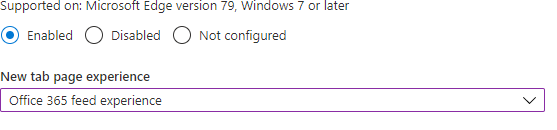
With this setting, the user will see this when they open up a new tab. They will see all their current documents/Teams/Notebooks.
It’s a really nice feature which shows the power of the Microsoft eco-system.
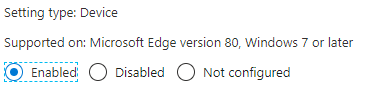
First run experience
The ‘Hide the First-run experience and splash screen’ setting is a really important one as it disables this wizard which really slows users down. All the settings that are normally configured here, are configured in other policies.
Select ‘Enabled’ to enable this policy.
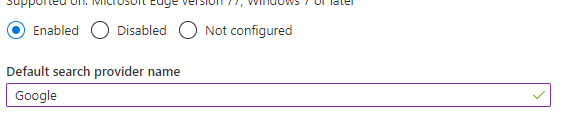
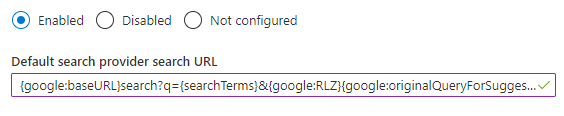
Search provider
As this is a Microsoft browser, the default search provider is Bing. In order to change this to Google we need to configure three different policies.
Set ‘Default Search Provider Name’ to Google.
Configure ‘Enable the default search provider’ as ‘Enabled’ so that the users cannot change it later.

The ‘Default search provider search URL’ makes sure that the Google API is used to search. Enable it and set the URL to ‘{google:baseURL}search?q={searchTerms}&{google:RLZ}{google:originalQueryForSuggestion}{google:assistedQueryStats}{google:searchFieldtrialParameter}{google:searchClient}{google:sourceId}ie={inputEncoding}’
Browser sign-in settings
When you configure this policy, you have the option to Force users to sign-in to use the browser.

When this policy is active, a user will not be able to start the browser without logging in. Thankfully, when a user use a Azure AD Joined/ Hybrid Azure AD Joined a user is logged in automatically without any interaction.
Force synchronization of browser data and do not show the sync consent prompt
The last policy is something that has been requested a long time and was finally released in October. This makes it possible to force enable synchronization. With this policy, we are sure all settings and passwords are sync’ed to Azure AD.
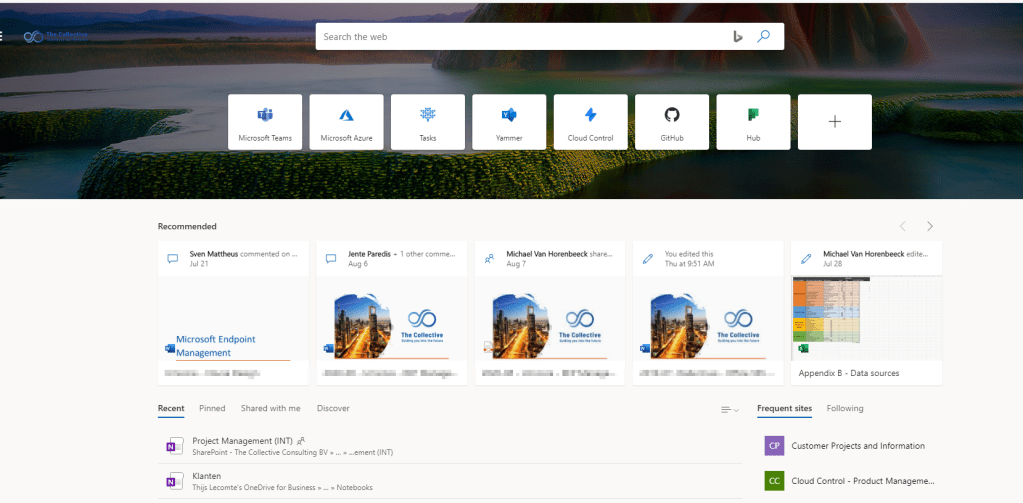
End Result
When all the settings have been assigned to a user, this is what the end result looks like.
As you can see, this is a tremendous improve in terms of user experience. We avoid any pop-ups, configure the browser how we want and copy the data the user had from Google Chrome.
Summary
Edge Chromium is a really nice application which makes the life of an IT administrator much easier. I hope that with the tips given in this blog, your migration to it is a bit easier!
Credits for the cover photo.
Categories
